Charlotte Cooks
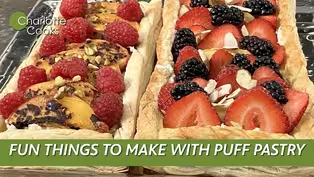
Fun Things to Make with Puff Pastry | Charlotte Cooks
Season 9 Episode 8 | 26m 46sVideo has Closed Captions
Chef Pamela Roberts will show you fun things to do with the flaky, layered pastry.
Don't let puff pastry intimidate you. Chef Pamela Roberts will show you fun things to do with the flaky, layered pastry. Using ingredients such as ham with cheese as well as fresh or canned fruit Pamela creates sweet and savory bites using this versatile pastry strait from the store.
Problems playing video? | Closed Captioning Feedback
Problems playing video? | Closed Captioning Feedback
Charlotte Cooks is a local public television program presented by PBS Charlotte
Charlotte Cooks
Fun Things to Make with Puff Pastry | Charlotte Cooks
Season 9 Episode 8 | 26m 46sVideo has Closed Captions
Don't let puff pastry intimidate you. Chef Pamela Roberts will show you fun things to do with the flaky, layered pastry. Using ingredients such as ham with cheese as well as fresh or canned fruit Pamela creates sweet and savory bites using this versatile pastry strait from the store.
Problems playing video? | Closed Captioning Feedback
How to Watch Charlotte Cooks
Charlotte Cooks is available to stream on pbs.org and the free PBS App, available on iPhone, Apple TV, Android TV, Android smartphones, Amazon Fire TV, Amazon Fire Tablet, Roku, Samsung Smart TV, and Vizio.
Providing Support for PBS.org
Learn Moreabout PBS online sponsorship(bright music) - [Announcer] This is a production of PBS Charlotte.
- [Narrator] The following episode of "Charlotte Cooks" is brought to you by Central Piedmont Community College, and viewers like you.
Thank you.
- Coming up on this episode of "Charlotte Cooks," we're making some sweet and savory tarts out of puff pastry.
(bright music) Welcome to this edition of "Charlotte Cooks."
I'm Chef Pamela Roberts, and I'm glad you're here with me today 'cause we're gonna make something that's really kind of fun and special, and who doesn't like puff pastry?
So I'm gonna show you today how to make some nice puff pastry shells, and we're also going to be filling these with some sweet and some savory fillings.
So I'm going to show you how to make these shells, and then I'm gonna show you another tart that we can make without having to make the shell.
So let's get started on the shells first.
So the first thing you're going to need is a beautiful piece of puff pastry.
Puff pastry is multiple layers, like thousands of layers of dough, and basically butter.
It's called laminated dough, and it's done in layers.
And so when it cooks, it puffs up really, really high.
And so if you have scraps of puff pastry, if you roll 'em up in a ball, it's not gonna be any good.
You have to keep your layers in order, so that they can continue to rise.
So what we're gonna do is we're just gonna take our dough, and we're gonna cut it basically into thirds.
Now, you're not gonna cut through, well, I guess you could cut through the parchment underneath because that's really gonna help us lift this up.
I'm gonna divide this into really roughly thirds, but it's gonna be a little bit different than thirds 'cause I've got this larger piece over here.
So I've got a base, and I've got a base, and now I'm gonna make two of my little units here, and all I'm gonna do is come down with this pastry and make some strips.
So far, y'all can do this, right?
This is not hard.
It's just knowing what the process is.
All right, I've got my strips cut.
I'm gonna take a little bit of egg wash.
Egg wash is just nothing more than a little bit of egg, you beat it up with a little bit of water, and I'm going to egg wash the base.
Remember, these larger slabs are my base, and the egg wash is going to act as a glue to hold these pieces on.
So just gently rub it back and forth.
Get it all on there.
And then we're gonna take a strip.
Now, be careful when you pick these up, guys.
You don't wanna stretch it, okay?
You don't wanna stretch it, and you're just gonna take it, and you're gonna lay it down, and you wanna make it fit, because if it doesn't fit, it means you stretched it.
Okay, so lay that down there, line it up, press it down, so it's gonna stay in place.
We're gonna take another piece.
We're gonna do the same thing.
Put it right down here, and if we stretched it, we're gonna make it fit.
I'm stretching it.
Okay, there we go.
Cut that bit off.
And now we've gotta get a piece to go here and a piece to go here.
So what I'm going to do is I'm going to take my other strip, and I'm going to measure it.
I'm gonna start with this end.
I'm gonna lay it down, lay it here, and give it a little cut.
Don't cut it all the way through.
Just cut your little strip.
Lift this up.
Put this down here.
Once again, do this, okay?
And so now our next step is going to be to take this, and we're gonna put a little decorative border on here, and the way you do that is you just take your knife, and you cut ever so slightly.
You're not cutting all the way through the pastry.
You're really just making a slight cut in the surface.
And this is just on the border because this is what's going to give your border a little bit of decoration.
So now, I've got one side done.
I'm gonna come back, and I'm gonna just X it.
Give little Xs.
So we got little diamond shapes happening on the edge of this pastry.
Oh, goes this way, and this just makes the pastry, you know, it makes it really pretty.
If you didn't wanna do this, you don't have to.
I just like doing it because I like the decorative edge.
So now, we're gonna take this, and we're gonna put this onto a sheet pan.
When you lift this up, this is why the parchment underneath is very handy, because you're gonna be able to lift this up without damaging your dough.
We're gonna lay this in the middle of a sheet pan.
We wanna put this in a 400 degree oven, and it only is gonna take about maybe 10 minutes, and it's gonna get golden brown, and it's gonna really poof up.
When it poofs up, the bottom is gonna poof up, but we don't want that bottom to stay poofing up.
So when it comes out of the oven, right away, you've gotta take something that has a nice little offset to it and also has a little point that you can get into the corners, and we're gonna press that center down.
And when it comes out of the oven, I'm gonna show you how that's done.
So I'm gonna pop this into the oven right now.
(pan rattling) So there's another way to make a tart.
We're gonna make this one out of zucchini and yellow squash, and we're also going to be using a savory cheese for this.
And so you don't have to build a border for this one because you put it all in the oven, and the weight of the zucchini and the squash keeps the center down, and the sides poof up around it, and it's really kind of nice.
This is a beautiful vegetable dish.
My son loves it for breakfast.
It's just, really, a nice little dish.
So what we're gonna do is, once again, we're gonna cut our pastry just like we did before.
Because this is the shape we're doing today, okay?
We don't have to put anything inside around the edges.
But what I am going to use is I'm going to use a nice flavored soft cheese.
These cheeses come in lots of different flavors, and this one is a garlic and herb flavor.
They come in pepper, they come in shallot, they come in all different kinds of flavors, and so any flavor that you like, you can use.
When we get to the other tarts, I'm gonna show you some other fillings you can use too.
All you're gonna do with this is you're going to smear this cheese in the center.
Keep it off the edges, all right?
Not on the edges.
You wanna make sure that you have a nice border around it 'cause remember, whatever the cheese and the zucchini and the squash are on, it's going to hold that pastry down, and it's not going to allow it to rise.
That's enough of this.
I'm gonna go ahead and put this on a sheet pan.
Now, I'm gonna put this back on my puff pastry stack, and cover it with parchment, so it doesn't dry out.
And now I'm gonna get a bowl.
You want a nice big bowl, and if you have a slicer, like a mandoline or something, this is a handy thing to have.
If you do not have one of these, there's no reason you can't cut these with your own knife.
Okay, the secret to this though, guys, is to make sure you are getting a very thin slice.
So I'm gonna cut the top and bottom off of a zucchini and a yellow squash.
You're gonna be making one of these tarts.
You might wanna look for your squashes that are more straight, like these are.
So we're gonna cut the top and bottom off, off of this, and there we go.
So now, I'm gonna use my mandoline.
So you're gonna take your vegetable, and you're gonna put it on here, and you're gonna slide it forward, and we're just gonna do this until we have about maybe, oh, about six slices.
So you can make this tart and have quite a bit out of one piece of vegetable.
So now, we're gonna do our yellow squash.
The first couple slices, guys, are probably not gonna be the ones you wanna use, but let's just go ahead and get some slices on.
There we go.
So when you're using this, guys, it does tell you on the machine itself, watch your fingers.
And so if you're letting your fingers go down there, just be...
These are razor sharp blades, and they will cut you in a heartbeat.
Keep your hand on top.
Keep your little finger and your thumb up, press down, and when you are uncomfortable, stop.
Don't keep pushing it down to the very last little nub.
That's not necessary.
You got squash left over.
Slap 'em together so they don't dry out.
So now, what we have in our bowl.
Look at these beautiful ribbons of squash.
Aren't those gorgeous?
And so what I'm gonna do is I'm gonna season this with a little bit of salt, a little bit of a salt-free herb blend, and also a little bit of olive oil because olive oil's got great flavor.
So salt.
Put a little more salt in there.
Put a little bit of cracked black pepper.
And we wanna see the pepper.
That's why I'm using the cracked black.
And I'm just going to take a little bit of this in here, just a little, and I like it that it's salt-free.
And now, a little bit of olive oil.
You don't want this swimming in olive oil.
So carefully, take your tongs, 'cause remember your tongs are hard metal, and these are soft, delicate little squashes.
I'm just gonna toss this.
(vegetables rustling) Okay, so now, my squash are coated, and they're all seasoned, and now I'm gonna bring this back over here, this over here, and now you can do this any way you want to, any design you want to do.
I've even seen people take 'em and braid them together.
I've seen them actually make like a lattice with them.
But you really don't have to do that.
You can just take these and lay them out, so that you get visual of both the yellow squash and the zucchini.
Okay, you wanna make sure you have it going down to the end, and up here at the top.
So now, this is ready to go into the oven.
Now, one thing I wanna point out.
Notice your border all the way around here.
This is going to puff up all the way around, and it's gonna give you that same kind of shell that we have in the oven right now, that's baking, that's gonna be a lot like these.
Let me talk about egg wash.
If you put that in the oven just the way it is, it will come up, and it will be, you know, it'll be pastry, but it's not gonna be shiny.
So if you want it to be shiny, just take a little bit of your egg wash.
Remember, egg wash is egg and water, and you're only gonna do the border 'cause remember, the border is the only part that's really exposed.
And now, when that pastry poofs, it's gonna be really pretty.
It's gonna have a nice little golden brown shine to it.
So once again, 400 degree oven, and this is going to take also about 10 minutes.
So now, we're gonna start cutting our peaches.
But before we do that, I have a sneaking suspicion that that puff pastry we put in the oven earlier is gonna be ready.
So let's take a look at that one real quick.
This is what it looks like when it comes out of the oven.
Isn't that great?
And so something you have to be aware of is that there's no room for any kind of a filling to go in the middle here that we can stick our stuff on.
So we have to push this down.
You gotta do it carefully, okay?
So all this is a bunch of air, so I'm gonna make a little slit in here.
So it's really not... You can't really see it.
You have to be careful with this, guys, 'cause it's really crumbly, okay?
And you have to do this when it right comes out of the oven, 'cause if you wait until it cools, it's just gonna fall apart on you.
Press gently.
Turn the pan around.
Press gently.
Now, remember, we put those slits down the center, so all the steam now is coming out of those little slits, and it's the steam between the pastry layers that makes this pastry rise.
Now, look at that.
Now, see, this shell is ready.
Whatever filling we wanna put in here.
I'm gonna let this cool down 'cause we do have some fillings that we're gonna put in here that we don't want 'em to be warm or hot.
So I'm gonna let this guy cool down while I do some peaches.
There is a difference between peaches.
Peaches can be what we call clingstone, which means the flesh will cling to the stone, or peaches will be freestone, which means the flesh will easily be removed from the stone.
So let me show you.
I believe this one's clingstone, and I believe this one is freestone.
How do you know?
Sometimes you just have to trust your farmer, and sometimes you have to trust the signs.
But this is one way to tell.
So if I cut this like this, and one thing that I've found about peaches sometimes is that when you cut them, sometimes the stone inside will split in half.
So instead of cutting it along this line, I'm gonna cut it opposite that because this is where the seam of the seed is inside as well.
So just cut it in half all the way around.
Put your knife in, go all the way down to the stone, and then let your knife... Ooh, look at that juice.
I'm gonna capture that juice.
Let your knife go all the way around the peach.
Take your peach, and pull it apart.
Oh, are you not gonna be clingstone?
Oh, no, this is a clingstone peach.
If I keep trying to pull this apart, I'm gonna turn this into mush.
So this is how you get a clingstone peach to actually come off.
Take it.
Just get your knife down to that stone.
Get it down to the stone, and just give it a little sideways swish.
A little sideways.
Oh, this is coming off now.
Okay, you can come off, and this way, you're gonna not leave much flesh on the stone, and you're gonna get all of your peach, and you're gonna have nice shaped wedges.
But the next thing we're gonna do with these guys is we're gonna take these, and we're gonna...
Here's the stone.
Come on.
Here's the stone.
And I'm gonna put this on the cutting board and give it another, a little thinner slice.
So I've got a warm cast iron skillet here.
I'm gonna take a couple drops of oil.
Now, we're not frying these, and the only reason I'm putting a couple drops of oil in there is to give the bottom of this pan a little bit of moisture, so the peaches don't stick, okay?
(pan sizzling) Just drop them in here, and all you're looking for here, guys, is just a little bit of color on one side of your peach.
So while those are getting a little color on 'em, let's take a look at this peach.
Feel your peaches.
If they're rock hard, guys, they will totally get soft on you, and they don't take very long to get soft.
You wanna feel just a little bit of a give in these peaches, so that you're gonna have a nice, ripe, sweet peach.
Once again, I'm gonna cut it this way.
Not along that seam line.
See what happens here.
Freestone.
That's a freestone peach.
You see how that comes out?
And sometimes when the peaches are super ripe, this is why I always cut it off of this seam here.
See the seam of the seed here?
When you start cutting it, sometimes you just split the seed wide open, and you don't really wanna do that because then it makes it hard to get the freestone peach off of the seed.
That's called a freestone peach.
Is there a difference in flavor?
Not really.
Difference in texture?
Not really.
The only difference here, guys, is in the actual clinging to the seed or not.
So while our peaches are getting a little bit of color on 'em, we're gonna go ahead and fill this one with a whipped ricotta.
Now, this is a non-dairy whipped ricotta.
You can get them made out of almond milk, and that's what this one's made out of, or you can just use regular ricotta cheese if you like.
And you can actually take some herbs and things and mix it into this cheese as well, if that's what you like to do.
But we have those beautiful, beautiful peaches.
So now, we're just gonna take this.
You have to be careful when you're spreading this out because it is flaky.
And so you can use another spoon to help you get it off, and try not to break up all those flakiness down there 'cause it is gonna be an extra flaky, because, remember, we pushed that center down.
So just get this spread out all over the bottom.
That's gonna be a wonderful, delicious addition to our bite, this nice, creamy ricotta.
Now, I betcha our peaches are ready.
Let's take a look.
Oh yes.
Okay, so now, we're gonna take our peaches out.
We're gonna just line them up.
Ooh, a nice dark one.
That's all those peach sugars all caramelizing and getting nice and sweet on you.
And actually press it down into that beautiful ricotta cheese.
The next thing we're gonna add to this dish is some raspberries.
And take some raspberries and just dot them all over here.
Okay, just throw them on, tuck 'em down into that beautiful, beautiful cheese.
Peach and raspberry.
This is a classic combination.
It's like a Melba kind of flavor.
So if you ever see a peach Melba on a menu somewhere, it's a poached peach with raspberry sauce.
Now, we're gonna finish this off with a little bit of toasted pistachio.
And then we have one more thing we're gonna put on this to really make it pop.
We're gonna add a little bit of honey.
This is a nice fresh local honey.
We just want a little bit over the top, just a nice little drizzle, and that is one of our tarts.
So the next tart we're going to do, we're gonna use a sweetened cream cheese down here.
The cream cheese has been sweetened with 10x sugar.
10x sugar is powdered sugar.
And the reason we use 10x sugar is because it doesn't leave that graininess.
It melts.
I mean, well, it's melted.
It doesn't have a graininess to it when you put it into a cream cheese.
Cream cheese needs to be really soft, all right?
If it's not soft, it doesn't spread smoothly.
And so you wanna put this into a mixer.
Add a little bit of honey or a little bit of sugar.
You can put a little vanilla in here if you want to.
But what I'm gonna do with this, just like we did with the ricotta cheese, is I'm gonna put this into the center, but we're gonna try some strawberries, and I'm gonna see what those baby bananas look like.
I'll show you.
This is the base, and the reason we add the cheeses or whatever it is down here in the bottom.
Now, if you didn't wanna use cream cheese, you can use a vanilla pudding.
All right, you can use a boxed pudding if you want to.
You can make it from scratch if you want to.
But the whole point of this is to give it something to have the fruit stick to.
So next, I'm going to take my beautiful tarts, and I'm gonna put them right over here.
Slide on down.
There you go.
Put 'em right here.
I'm gonna take my knife, and I'm gonna cut some strawberries.
(knife thudding) Okay, oh, we have three rows of... Let me show you these bananas.
(Pamela laughing) Look at these guys.
(Pamela laughing) They're just adorable.
So here we go.
Let's see what they're like.
Let go ahead and cut 'em down.
(Pamela chattering) And because these are small, little tiny, tiny, tiny, miniature bananas, we can take this banana, and just lay it right there.
Now, we're gonna add more strawberries.
Put more strawberries in here.
So now, we're gonna have a strawberry banana, and we can also put some kiwi in here.
We can also use some blackberries.
And if you didn't wanna add a whole bunch of other extra fruit, you could fill it up with all strawberries, blackberries, which I'm gonna put a couple of those in here too.
Put another banana in there.
Go ahead and cut 'em open.
So he comes right on out.
You can use regular bananas too, y'all.
You don't have to use baby bananas.
Okay, some blackberries.
Let's tuck that in there.
Blackberries, blackberry, and some more strawberries.
(knife thudding) Very amazing combination with strawberry.
And there's this one.
Let's see if we can put some almonds on here maybe.
A little bit of toasted almond on top.
And once again, if you wanted to put some honey on here, you certainly could.
We've gotta get the one out of the oven.
Let's get that zucchini out of the oven.
Ooh.
Here's the zucchini tart.
See how the edges rose up around it?
Isn't that beautiful?
Next, we have the raspberry, peach, and ricotta.
We are gonna have a sweetened cream cheese with strawberry, banana, and blackberry with toasted almonds, and then we're gonna make the savory tart.
Now, this one's going to be a little bit different because it's made with avocado.
Think avocado toast.
When you go to the store, you wanna look for avocados that still have this little bop right in there.
See that little button where it came off the tree?
These all have one.
So how do you tell if they're ripe?
Take that out.
If that's brown inside, this is gonna be a brown avocado.
If it's green inside, it's gonna be green, and I really can't tell what color these are.
So we're gonna open these up and see what color they are.
So what I'm going to do with this avocado, just like I did with the peach, inside this avocado where this big bulbous part is down here, there's a big seed in there.
Okay, I'm gonna put my knife in the top, and bring it all the way down until I hit that seed.
There's that seed.
Then, I'm gonna roll my avocado around underneath my knife, keeping my knife in contact with that seed.
Come all the way around to the side again, and just like we did with the freestone peach, we twist, and voila.
There we go.
Avocados go through separation anxiety when the seed is removed and it's thrown away.
They go "Oh, where's my seed?," and they start turning brown on you, and I'm anthropomorphizing avocados right now, but that's okay.
But take a big spoon.
We are going to take this, and we're gonna slide it under here, so we can get the avocado out in as close to one piece as we can.
We're gonna turn him over on the cutting board.
We're gonna take that little divot out of the center.
That was where that little thing was.
And then this is the way you get your seed out of the other side.
Put your knife in, and pop it out, okay?
And then throw... Keep your seed because you wanna keep your avocado and your seeds kind of close to each other.
If you're making guacamole, put the avocado seed right in the middle.
It won't turn brown.
If you're storing avocado, make sure you put it in the seed, probably keep it in its little shell, and put it together, and it'll turn brown less quick on you.
Now, when they're exposed to air, they are gonna turn brown.
So we have to be aware of that.
One of the things that we can use to prevent that from happening is lemon juice and the seed.
So there we go.
So now, on this tart, as I said, think avocado toast.
Gonna make some beautiful thin slices of my avocado.
I'm not sure.
All right, little tarty, I have to bring you up here.
So let's cut these.
I'm not gonna put any cheese in the bottom of this.
Why?
'Cause avocados are creamy.
And now, I'm going to take these avocado slices, and this is the tricky part here 'cause you've got all these avocados here.
And now we just wanna cover this entire bottom of this tart with the sliced avocado.
We have this other half.
Press it in, pick this up, and get it in your hand.
And once again, spread this beautiful green avocado out.
I'm going to bring a beautiful variety of tomatoes.
We've got yellow tomatoes.
We've got the green tomatoes.
And all I'm gonna do is slice these things in half and start putting some different colored tomatoes on top of this.
Now, if you didn't wanna do the whole halves, you can cut 'em into quarters.
There's no reason why not.
So you have a different shape, and a different color, and a different size.
We're just gonna do this with a few different kinds of tomatoes.
This is a pretty one.
Make sure you wash your tomatoes first, y'all.
I'm going to add some radish sprouts, and radish sprouts have a nice, nice, nice tang to 'em.
They've got a nice little bite, just like a radish does.
But do remember, your sprouts do have flavors, and so having your radish sprout here is gonna add a nice little spice to this avocado.
We're gonna take a little bit of Maldon Salt.
Maldon Salt is a salt that actually has a pyramid-shaped flake.
If you look at it, it's got these gorgeous little pyramids.
They're very crunchy, and they're very light.
It's not like biting into a hard rock salt.
They're very, they're ah!
It's refreshing, and they look really pretty too.
If you put 'em on there, they look like little, you know, flecks of ice or something.
Alright, we're gonna grab a little bit of cracked black pepper too.
A bit of cracked black pepper right over the top.
I'm gonna put pistachios on this one as well.
You can leave the nuts off if you like, but you don't need very many.
Just a little bit.
And the last thing, especially for the avocado, give it a little squeeze of lemon just over the surface.
Whoops, it's getting on the strawberries.
And there you go.
So now, we have our three beautiful tarts.
These are the ones we made the shell for, and you add your whipped ricotta cheese, sweetened cream cheese.
You can use avocado as a base and just make it really nice and savory.
We have our zucchini and herbed cheese underneath.
That is a gorgeous tart.
Slice that.
I mean, you take these to a picnic, take these to a party, take these to, you're gonna be invited back, baby, because these are marvelous.
And be creative with your fillings, guys.
You can put any kind of a pudding, soft cheese, whatever kind of flavors you want into a cream cheese.
It just makes it really yummy to have all that stuff nice and creamy underneath, beautiful savory things, beautiful sweet things.
So enjoy this.
I hope you've learned something from puff pastry.
You don't have to make a border if you're gonna bake it.
If you're gonna do it cold, you do have to do a border.
Well, thank you for watching this episode of "Charlotte Cooks."
I'm Chef Pamela Roberts.
If you wanna grab our recipes for these or any of our shows, check out our website at pbscharlotte.org, and thanks for watching.
I'm gonna catch you next time on "Charlotte Cooks."
(upbeat music) (bright music) - [Announcer] A production of PBS Charlotte.
Fun Things To Make With Puff Pastry Preview
Preview: S9 Ep8 | 53s | Chef Pamela Roberts will show you fun things to do with the flaky, layered pastry. (53s)
Providing Support for PBS.org
Learn Moreabout PBS online sponsorship

- Food
Christopher Kimball’s Milk Street Television
Transform home cooking with the editors of Christopher Kimball’s Milk Street Magazine.


Support for PBS provided by:
Charlotte Cooks is a local public television program presented by PBS Charlotte